
The Nintendo 3DS family might have officially ended production in 2020, but millions of players still boot up their systems for Pokemon, Zelda, and a library of classics that never made it to Switch. There’s one problem that plagues nearly every 3DS owner: a lost or broken stylus. That tiny plastic stick is more than an accessory, it’s essential for navigating menus, battling in RPGs, and playing dozens of titles that are borderline unplayable without it. By 2026, finding the right replacement has gotten trickier with official production long halted, but plenty of options still exist if you know where to look. This guide breaks down everything from compatibility differences between models to where you can actually buy a decent stylus today, plus how to spot quality third-party alternatives that won’t scratch your screen or snap after a week.
Key Takeaways
- A Nintendo 3DS stylus is essential for optimal gameplay in dozens of titles like Zelda: Phantom Hourglass and Pokémon, as the resistive touchscreen demands precision that fingers cannot deliver.
- Stylus compatibility varies across 3DS models—the original 3DS and 2DS have different storage slot locations and dimensions than the XL variants, so always match your replacement to your specific system model.
- Official Nintendo replacement styluses are no longer produced, but quality third-party alternatives from brands like TOMEE and Insten are widely available in affordable multi-packs on Amazon and AliExpress.
- Avoid ultra-cheap no-name styluses and metal-tipped options, which scratch screens; instead prioritize ABS plastic construction with smooth, rounded 2mm tips that feel responsive without requiring excessive pressure.
- Regular maintenance—cleaning the tip with a microfiber cloth, using light pressure during play, and storing styluses properly—extends lifespan and prevents screen damage.
- Secondhand retro game stores and eBay offer authentic used Nintendo styluses for $3–8, making them a reliable source for genuine replacements when official stock is unavailable.
What Makes the Nintendo 3DS Stylus Essential for Gameplay
The 3DS touchscreen isn’t just a gimmick, it’s core to how the system operates. Unlike the Switch’s optional touch controls, the 3DS relies on stylus input for system navigation, menu management, and hundreds of games that demand precision.
Titles like The Legend of Zelda: Phantom Hourglass and Spirit Tracks require constant screen interaction for puzzles and combat. Pokemon games from X/Y through Ultra Sun/Ultra Moon make team management and battles smoother with stylus input. Strategy titles, RPGs, and visual novels often design entire interfaces around touchscreen interaction.
Without a stylus, you’re forced to use your finger, which works, but sacrifices accuracy and speed. Fingers leave smudges, can’t hit small UI elements reliably, and make extended play sessions uncomfortable. Some games become frustratingly difficult without the precision a stylus offers. Even simple tasks like typing on the virtual keyboard or organizing your HOME menu turn into chores.
The resistive touchscreen technology used in all 3DS models was designed specifically for stylus input, not capacitive finger touches like modern smartphones. That means stylus pressure and tip shape directly affect responsiveness and control quality.
Understanding Different 3DS Stylus Types and Compatibility
Not all 3DS styluses are interchangeable. Nintendo produced different sizes and designs across the family, and using the wrong one ranges from awkward to impossible depending on your model.
Original Nintendo 3DS Stylus Specifications
The original 3DS stylus measures approximately 9.2 cm (3.6 inches) when fully extended via its telescoping design. It stores in a dedicated slot on the back-right side of the system. The stylus consists of two segments that slide together for compact storage and extend when needed.
The telescoping mechanism is the weakest point, many original styluses develop looseness over time, making them wobbly during use. The tip is a simple rounded plastic design that’s gentle on the resistive screen but lacks the precision of later, thicker styluses.
3DS XL and New 3DS XL Stylus Differences
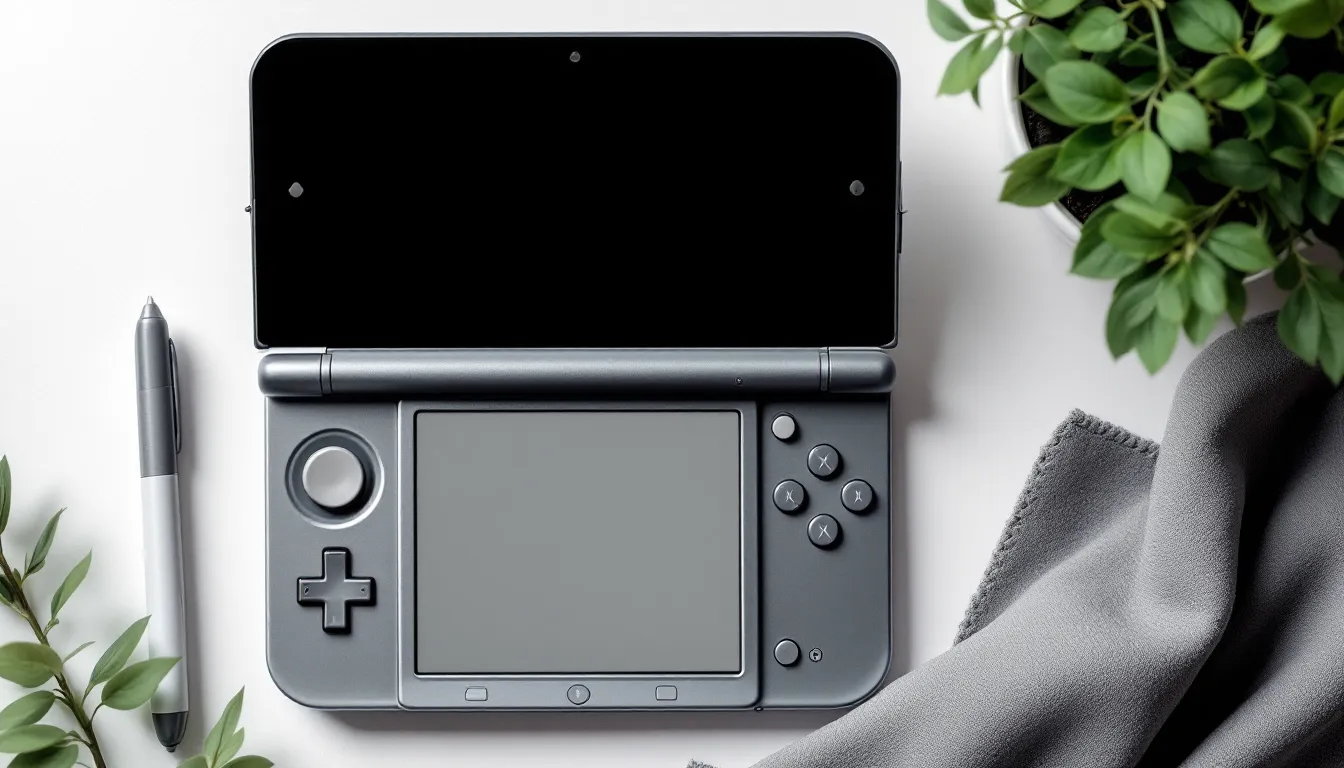
The 3DS XL stylus is significantly longer at approximately 10.6 cm (4.2 inches) and uses a similar telescoping design but with a thicker body diameter. It feels more comfortable during extended play sessions and provides better control due to the added length and grip surface.
The New 3DS XL uses the exact same stylus dimensions as the 3DS XL, they’re fully interchangeable. But, the storage slot moved to the bottom-right side of the system rather than the back, making it easier to access during gameplay without flipping the device.
Both XL variants have sturdier telescoping mechanisms compared to the original 3DS, though they still eventually develop play and looseness with heavy use. The tips are identical across all standard 3DS models.
2DS and New 2DS XL Stylus Variations
The 2DS introduced a non-telescoping stylus design that measures approximately 9 cm (3.5 inches) as a single solid piece. It slots into the back of the system and doesn’t extend or collapse. This makes it more durable since there’s no moving parts to break, but the shorter length can feel cramped for players with larger hands.
The New 2DS XL returned to a telescoping design similar to the New 3DS XL but with slightly different dimensions and a storage location on the bottom-right. Its stylus measures close to the XL size when extended but isn’t perfectly interchangeable due to slot size differences.
Compatibility matters when buying replacements. A 2DS stylus physically fits in other models’ hands but won’t properly store in their slots. XL styluses work across XL variants but won’t fit original 3DS or 2DS storage slots. Always match your replacement to your specific model.
Where to Buy Replacement Styluses in 2026
Finding replacement styluses in 2026 requires knowing which sources still have stock and which are selling overpriced junk.
Official Nintendo Replacement Options
Nintendo discontinued official 3DS stylus production alongside the hardware, and their online parts store no longer lists them as available. Occasionally, authorized repair centers or Nintendo’s customer service have leftover stock for warranty replacements, but consumer purchases aren’t guaranteed.
Your best bet for genuine Nintendo styluses is the secondhand market. Check local retro game stores, which often have bins of loose styluses from system trade-ins. Prices typically range from $3-8 depending on condition and model. eBay and similar platforms list authentic used styluses, but verify seller photos to confirm you’re getting the right model, scammers sometimes list generic third-party options as “official Nintendo.”
Authentic styluses have clean Nintendo branding, precise manufacturing tolerances, and consistent plastic quality. If the price seems too good at scale (like 10 styluses for $5), they’re almost certainly knockoffs.
Third-Party Stylus Alternatives Worth Considering
Third-party manufacturers still produce 3DS-compatible styluses, with wildly varying quality. Amazon and AliExpress carry dozens of options, typically in multi-packs ranging from $5-15.
TOMEE produces decent budget replacements that match official dimensions fairly well. Their styluses tend to be slightly lighter plastic but function adequately for casual play. They’re available in color packs if you want variety beyond Nintendo gray.
Insten multi-packs are hit-or-miss, some batches match OEM quality, others feel cheap and have rougher tips that might scratch screens over time. Read recent reviews before purchasing, as quality control varies.
StylusGaming and similar niche brands offer “premium” replacements with rubberized grips or metal construction. These cost $8-12 individually but provide better ergonomics for marathon gaming sessions. Just verify the tip material is plastic, not metal, metal tips will damage your screen.
Avoid ultra-cheap no-name styluses sold in 20+ packs for pennies each. They consistently have poor tip quality, wrong dimensions, or brittle plastic that snaps easily. Gaming communities dedicated to Nintendo hardware discussion often maintain lists of vetted third-party accessories worth buying.
How to Replace Your Lost or Broken 3DS Stylus
Swapping in a new stylus is straightforward, but understanding your system’s storage mechanism helps avoid frustration.
For original 3DS, 3DS XL, and New 3DS XL models with back-mounted slots, locate the small hole on the back or side edge of the system. The stylus slides in tip-first and clicks into place. If using a telescoping stylus, compress it fully before inserting. To remove, simply pull straight out, there’s no locking mechanism beyond friction.
The New 3DS XL and New 2DS XL with bottom slots work identically but are easier to access during play. Some users prefer keeping the stylus out entirely and storing it in a case pocket to avoid the hassle of removing it mid-game.
2DS systems have a back slot that holds the solid-body stylus. These are the most secure storage option since there’s no telescoping action to loosen over time.
If your replacement stylus feels loose in the slot, don’t panic, this is common with third-party options that have slightly different diameter tolerances. A small piece of transparent tape wrapped around the stylus shaft (near the storage end, not the tip) adds just enough thickness to create proper friction. Use one layer at a time and test fit until it holds securely without being difficult to remove.
For telescoping styluses that won’t stay extended, the internal spring or locking mechanism has failed. These are nearly impossible to repair, just replace the entire stylus rather than fighting with it.
Some players mod their systems to accept larger smartphone styluses by enlarging the storage slot with careful filing, but this voids any remaining warranty and can damage the housing if done incorrectly. It’s generally not worth the risk unless you’re experienced with hardware modding.
Evaluating Stylus Quality: What to Look For
Not all replacement styluses are created equal. Knowing what separates good from garbage helps you avoid wasting money on something that’ll damage your screen or break immediately.
Material and Durability Factors
ABS plastic is the standard material for quality styluses, it’s rigid enough to maintain shape but soft enough not to scratch screens. Nintendo’s official styluses use ABS or similar polymers with consistent density.
Cheap replacements often use recycled or low-grade plastics that feel brittle or overly flexible. Squeeze the stylus body gently, it shouldn’t bend or creak. Telescoping sections should slide smoothly with even resistance, not stick or wobble excessively.
Metal styluses look premium but are completely inappropriate for 3DS screens. The resistive touchscreen has a soft plastic coating that metal tips will scratch or gouge. Even “coated” metal tips wear through quickly. Stick to plastic-tipped options exclusively.
For telescoping designs, inspect the connection between segments. Quality versions have machined grooves that lock into discrete positions. Budget versions use smooth shafts with weak internal springs that lose tension after a few weeks, leaving you with a stylus that collapses mid-game.
Tip Sensitivity and Screen Protection
The tip shape and surface finish directly affect both control precision and screen longevity. Official Nintendo styluses have rounded tips with smooth, molded plastic that glides across the screen without catching or requiring excessive pressure.
Third-party tips sometimes have visible seams, rough edges, or overly sharp points from poor manufacturing. Run your finger across the tip, it should feel completely smooth with no ridges or texture. Even tiny imperfections will accumulate scratches over hundreds of hours of gameplay.
Tip diameter matters for precision. Nintendo’s tips are approximately 2mm rounded domes, which balance accuracy for small UI elements with durability. Overly sharp tips (sub-1mm) wear down quickly and can dent the screen surface. Blunt tips (3mm+) make precise input difficult and feel mushy.
Test responsiveness by opening a drawing app and making slow circular motions, then quick diagonal strokes. Quality styluses register smooth curves and sharp angles without skipping or requiring you to press harder. If the system only recognizes input with firm pressure, the tip is either the wrong hardness or too blunt.
Some premium replacements feature soft rubber tips instead of hard plastic. These work with capacitive screens but are unnecessary for 3DS resistive screens, stick with standard plastic unless you specifically want the softer feel. Rubber tips wear out faster and don’t actually improve responsiveness on resistive displays.
Common 3DS Stylus Problems and Solutions
Even good styluses develop issues over time. Here’s how to troubleshoot the most frequent problems.
Telescoping stylus won’t stay extended: The internal locking mechanism or spring has worn out. This happens with age and heavy use as the grooves that hold segments together wear smooth. There’s no reliable fix, the internal components aren’t designed for user repair. Replace the stylus entirely rather than fighting with one that constantly collapses mid-game.
Stylus won’t fit in storage slot: You either have the wrong model (XL stylus for an original 3DS, etc.) or a third-party option with incorrect dimensions. Verify your system model and stylus compatibility. If dimensions should match but the fit is too tight, lightly sand the stylus shaft with fine-grit sandpaper (400+ grit) in the storage area only, never near the tip. Remove only tiny amounts of material and test frequently.
Screen not responding to stylus input: First, rule out screen calibration issues by going to System Settings > Other Settings > Touch Screen. Complete the calibration process. If problems persist, the stylus tip may be worn, damaged, or made from the wrong material. Inspect for cracks, rough spots, or deformation. Test with a known-good stylus to confirm whether the issue is the stylus or the screen digitizer.
Stylus tip wearing down quickly: Excessive pressure during play causes accelerated wear. Resistive screens only need light touches, if you’re pressing hard, you’ve either developed bad habits or the screen sensitivity needs calibration. Some ultra-cheap third-party styluses use soft plastics that degrade rapidly. Switch to better quality replacements with harder ABS plastic tips.
Visible scratches appearing on screen: This usually means the stylus tip has rough edges, embedded debris, or you’re using a metal-tipped stylus. Stop using that stylus immediately. Clean the screen gently with a microfiber cloth to remove any particles, then inspect your stylus tip under good lighting. Even tiny imperfections can scratch. Replace the stylus and consider applying a screen protector to prevent future damage.
Stylus constantly falls out of slot: The shaft diameter is too small for your system’s slot tolerance, or the slot’s internal grip has worn out. The tape method mentioned earlier (wrapping a single layer around the shaft) solves diameter issues. For worn slots, there’s no good fix, the plastic housing has stretched and lost elasticity. Consider keeping your stylus in your case instead of the system slot.
Games That Require a Stylus for Optimal Play
Certain 3DS titles are designed entirely around touchscreen input, making them awkward or impossible without a stylus.
The Legend of Zelda: Phantom Hourglass and Spirit Tracks control Link entirely via touchscreen, movement, combat, puzzle-solving, and menu navigation. Finger-based play is technically possible but removes the precision that makes combat and puzzles satisfying. These games feel purpose-built for stylus input.
Pokemon mainline titles from Gen 6-7 (X/Y, Omega Ruby/Alpha Sapphire, Sun/Moon, Ultra Sun/Ultra Moon) don’t require a stylus for battles but make party management, item organization, and Pokemon-Amie/Refresh infinitely smoother with one. Competitive players especially benefit from the speed of stylus-based menu navigation.
Professor Layton series puzzles often involve drawing, tracing, or precise touch input that demands stylus accuracy. Many puzzles have finger-hostile solutions that require dragging small objects or connecting specific points.
Elite Beat Agents, Rhythm Heaven Megamix, and other rhythm games need the speed and precision only a stylus provides. Hitting rapid sequences or small touch targets with fingers introduces lag and inaccuracy that kills your combo.
Phoenix Wright: Ace Attorney investigations involve examining crime scenes by touching specific tiny details on cluttered backgrounds. Missing evidence because your finger was too wide is frustrating. Reviews on IGN consistently mention stylus necessity for the series.
Art Academy, Colors. 3D, and other creative apps are unusable without a stylus, finger painting on a resistive screen feels terrible and produces imprecise results.
Super Mario Maker for 3DS technically works with fingers, but placing blocks and objects precisely is significantly easier with a stylus. The creation interface is dense with small buttons and drag targets.
Even games that don’t strictly require it benefit from stylus use. Fire Emblem grid-based strategy, Bravely Default turn-based menus, and Animal Crossing: New Leaf inventory management all feel snappier and more accurate with stylus input over finger touches.
Creative Stylus Alternatives and DIY Solutions
If you’re stuck without a proper stylus and can’t wait for a replacement, several makeshift options work in a pinch.
Pen cap method: A hollow plastic pen cap with smooth edges can substitute temporarily. The resistive screen responds to pressure, not conductivity, so any smooth, non-sharp plastic works. Test gently first to ensure the cap won’t scratch your screen. This is uncomfortable for extended sessions but works for basic navigation.
Nintendo DS styluses: Original DS and DS Lite styluses are slightly shorter but fully compatible with 3DS resistive screens. If you have an old DS system lying around, borrow its stylus. DS Lite styluses are 8.7 cm long, noticeably shorter than 3DS versions but better than nothing. They won’t fit 3DS storage slots properly but work fine for actual gameplay.
Capacitive styluses won’t work: Don’t waste time trying smartphone or tablet styluses on your 3DS. Resistive screens require physical pressure, while capacitive styluses rely on electrical conductivity. They’re fundamentally incompatible technologies.
DIY construction: Some players craft emergency styluses from wooden chopsticks sanded to rounded tips, plastic drinking straws heated and shaped, or bamboo skewers with careful tip rounding. These require significant effort to make screen-safe and are generally not worth the time versus ordering a cheap replacement pack. If you attempt this, invest serious effort in smoothing the tip, any roughness will scratch your screen permanently.
Fingernail technique: In absolute emergencies, using the edge of a clean fingernail provides more precision than a fingertip pad. This feels awful, limits your control, and only works for minimal system navigation. It’s not a solution, just a way to hobble through basic menus until a real stylus arrives.
Universal resistive styluses: Some phone accessories stores still carry universal resistive styluses designed for old GPS units, PDAs, and early smartphones. These work with 3DS screens and cost $2-5. They’re usually pen-style with pocket clips, so they won’t fit storage slots but function perfectly for gameplay.
Honestly, third-party 3DS stylus packs are so affordable (often under $1 per stylus in multi-packs) that DIY solutions rarely make sense unless you need something immediately and can’t wait for shipping.
Caring for Your Stylus to Extend Its Lifespan
Proper maintenance keeps styluses functional longer and protects your screen from preventable damage.
Clean the tip regularly: Oils from your hands, dust particles, and pocket lint accumulate on stylus tips over time. These contaminants can scratch screens during use. Wipe the tip with a clean microfiber cloth every few gaming sessions. For stubborn buildup, slightly dampen the cloth with water, never use alcohol or cleaners, which can degrade plastic.
Store properly when not in use: If keeping your stylus in the system slot, ensure it’s fully compressed (for telescoping models) and pushed in completely. Partially inserted styluses bend or snap if the system gets bumped. For separate storage, keep it in a protective case pocket away from keys, coins, or other hard objects that can scratch or crack the plastic.
Avoid extreme temperatures: Don’t leave your 3DS and stylus in hot cars, direct sunlight, or freezing conditions. Plastic becomes brittle when cold and can warp or soften in heat. These extremes damage both the stylus body and the screen’s resistive layer.
Use light pressure during play: Resistive screens only need gentle touches to register input. Pressing hard doesn’t improve responsiveness, it just wears out tips faster and can damage the screen’s pressure-sensitive layer over time. If you find yourself pressing hard, recalibrate your touchscreen in system settings.
Inspect for damage before use: Before each gaming session, quickly check the tip for cracks, rough spots, or embedded debris. Even tiny fragments of harder material stuck to the tip will scratch your screen across hours of play. If you notice any damage, switch to a backup stylus immediately.
Keep backups available: Styluses are small, easy to lose, and eventually wear out. Buy replacements in multi-packs (most third-party options come in 3-10 packs) and keep spares in your case, desk drawer, and anywhere you regularly play. At current prices, there’s no reason to be caught without a working stylus.
Don’t use styluses on dirty screens: Dragging a stylus across a dusty or grimy screen grinds particles into both surfaces, causing scratches and accelerating wear. Keep a microfiber cloth handy and wipe your screen before extended play sessions. This simple habit dramatically extends both stylus and screen lifespan.
Replace worn tips proactively: Once a tip shows visible wear, flattened areas, cracks, or roughness, replace the entire stylus. Worn tips require more pressure to register input, which accelerates further degradation. At sub-$1 per stylus in bulk packs, there’s no financial reason to keep using damaged ones.
Conclusion
The 3DS family remains a fantastic platform in 2026, with a library that still hasn’t been fully replicated elsewhere. Keeping a proper stylus on hand ensures you can actually play that library the way developers intended. Whether you’re tracking down authentic Nintendo replacements through retro stores, ordering vetted third-party multi-packs online, or exploring handheld gaming alternatives, the key is matching the right stylus to your specific system model and prioritizing quality over the absolute cheapest option.
Resistive touchscreens reward precision and care, use light pressure, keep tips clean, and store properly to avoid the frustration of broken or lost styluses mid-session. With official production ended and the secondhand market your best source for OEM parts, stocking up on backups now makes sense while decent options remain available and affordable. Your Zelda playthroughs, Pokemon teams, and Ace Attorney investigations will thank you.